¶ Introduction
This article provides step by step instructions to add the DEX Dashboard as an SSO app within EntraID. Please follow the steps in this article in order. If you have questions email support@wyebot.com.
¶ Instructions
This guide was written using the Entra ID dashboard as of 11/25/2024 - future revisions may change the interface slightly.
- Log in to your DEX Agent dashboard. Navigate to the Users tab. Scroll down until you see SAML Authentication. Click the Add IdP button.
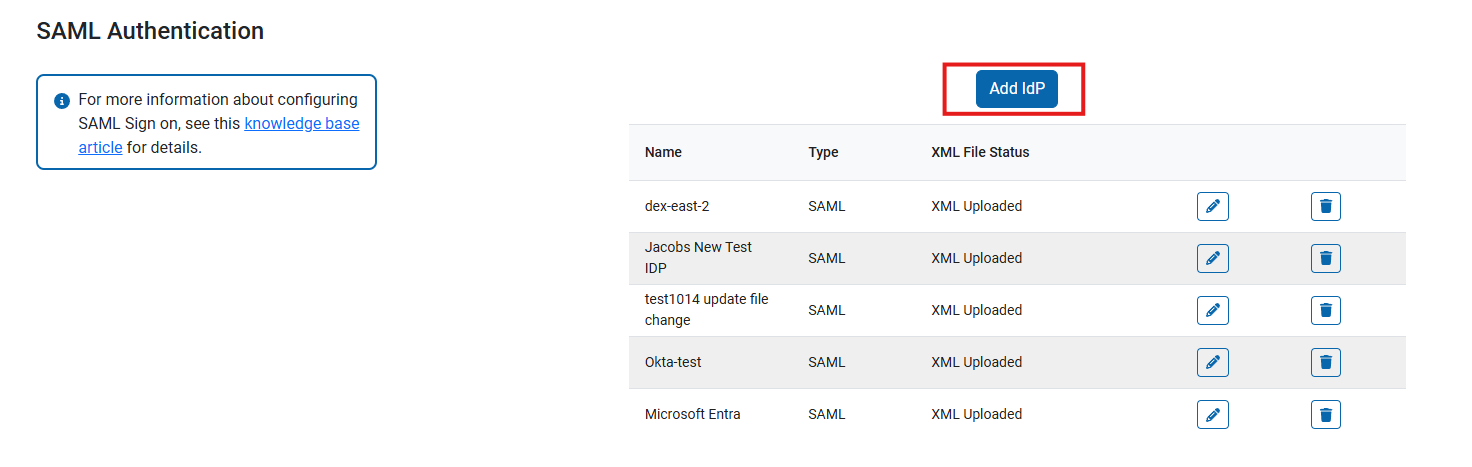
- Set the IdP Name field to your preference. Leave the rest of the options as default for now. Click Add IdP.
After this is complete, we will switch to the Entra ID configuration. Leave this browser tab open, we will return to it soon.

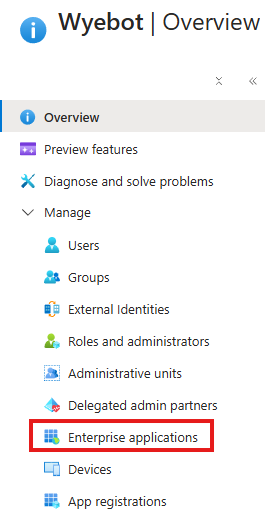
- In a new browser tab, log into your Entra ID admin dashboard. On the left-hand sidebar, click Enterprise applications.
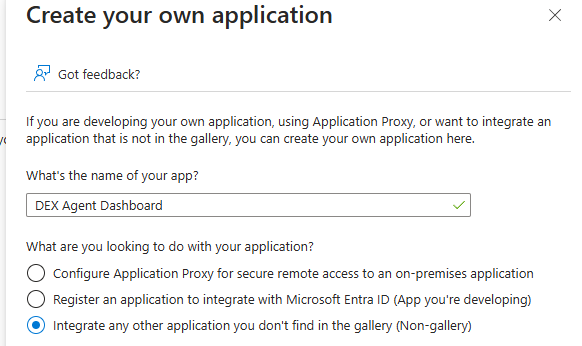
- Click New application then Create your own application

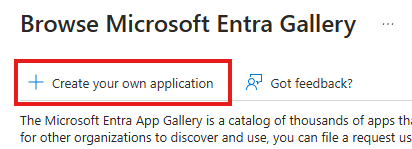
- Name the app whatever you'd like. Make sure the Non-gallery button is selected. Click Create.
- A new page will load where we will configure the DEX Agent Dashbaord app. On the sidebar, click Single sign-on.
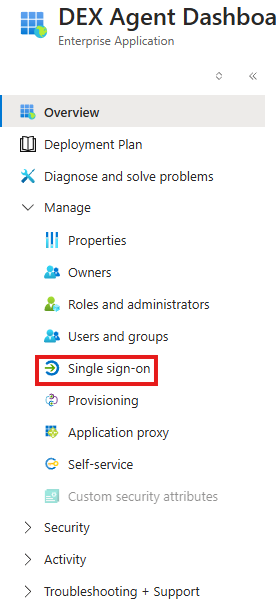
- For single sign-on method, select SAML.

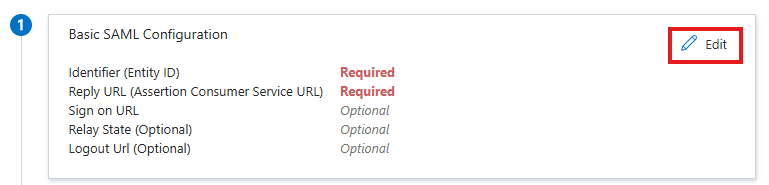
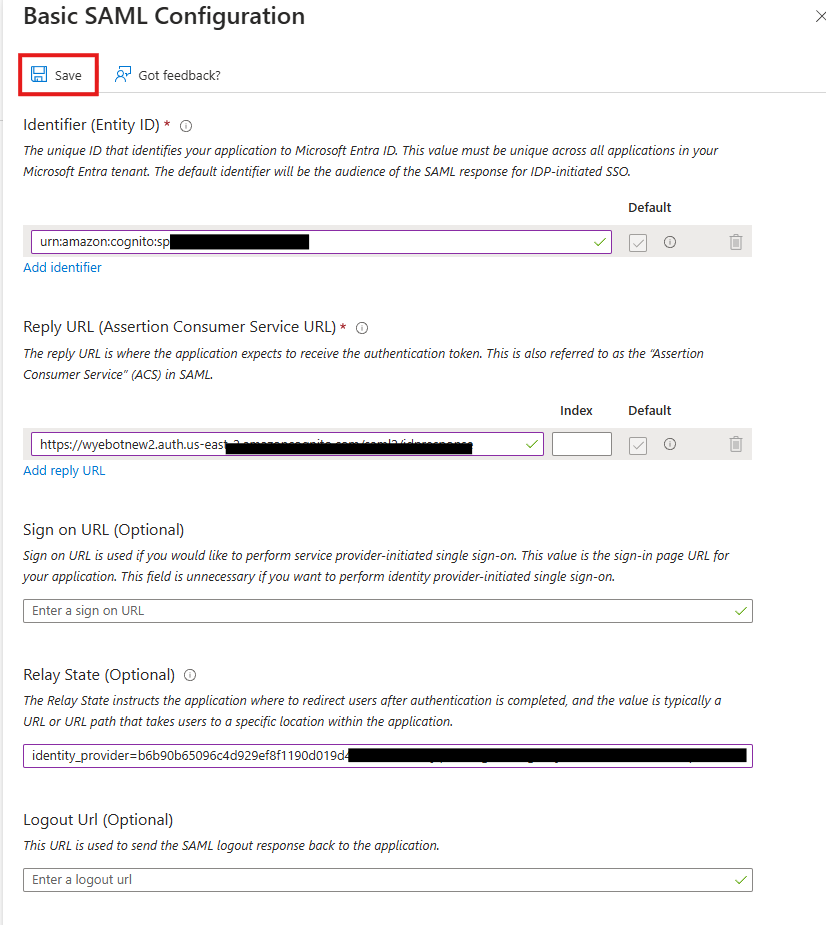
- Under Basic SAML configuration click Edit.
- Return to the DEX Agent Dashboard browser tab. Go to the Users tab and Edit the IdP you added in
step 1. You will now see the fields that you will copy and paste into EntraID.
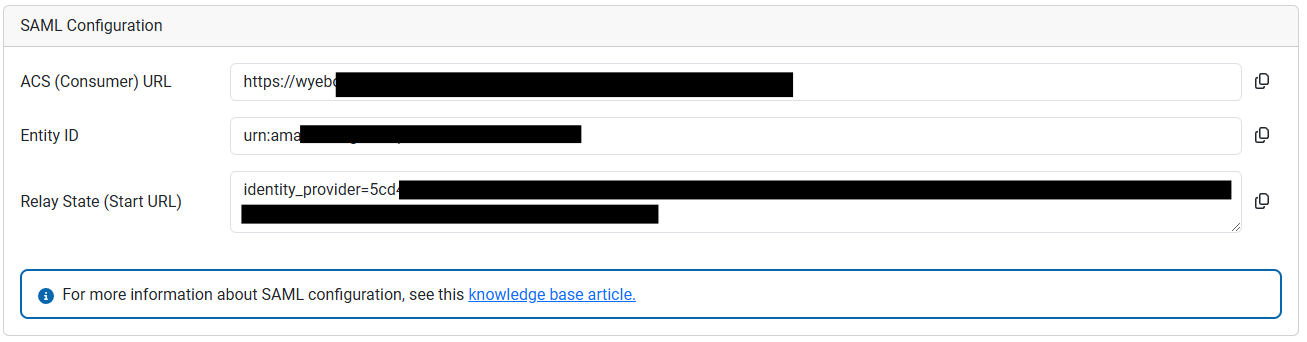
- Return to the Entra ID browser tab. Paste the fields using the mapping in the table below. When finished click Save.
| EntraID Field | DEX Agent Dashboard Field |
|---|---|
| Reply URL (Assertion Consumer Service URL) | ACS (Consumer) URL |
| Identifier (Entity ID) | Entity ID |
| Relay State | Relay State (Start URL) |
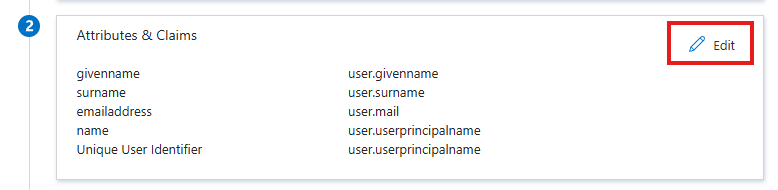
Next, we will configure Attributes and Claims.
- Click Edit next to Attributes and Claims
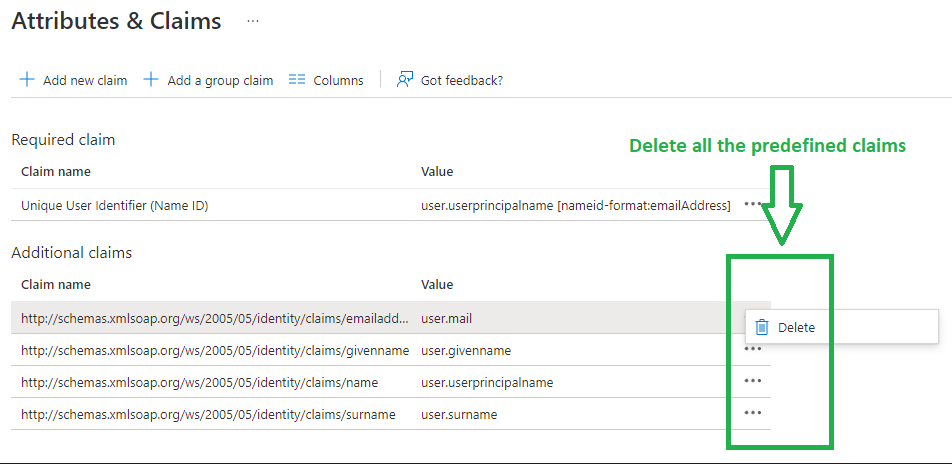
- You will need to Delete all existing entries under Additional Claims.
- Then, click Add new claim.
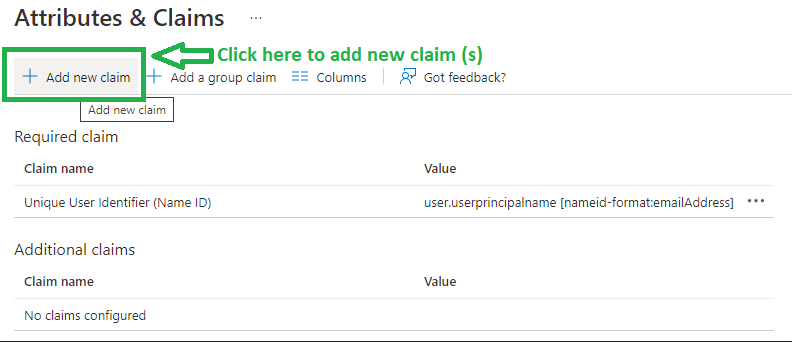
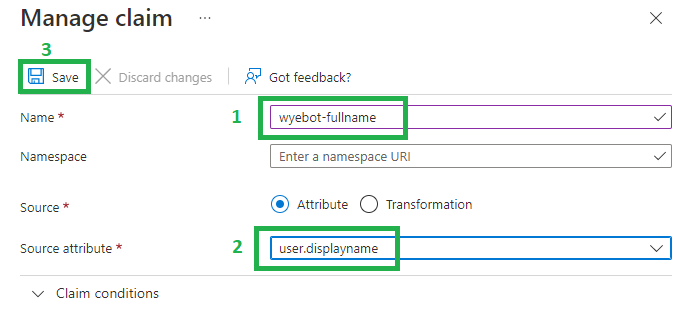
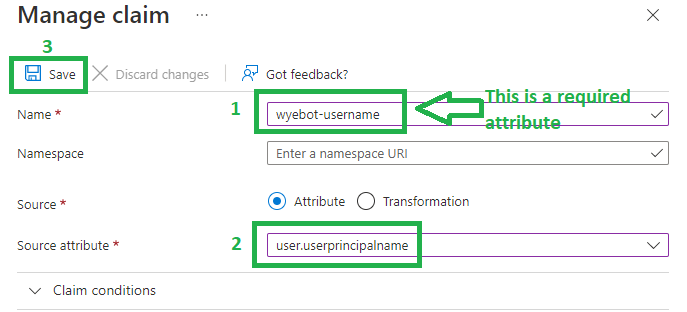
- Create two new claims:
|Name|Source Attribute|
|-|-|
|wyebot-fullname|user.displayname|
|wyebot-username|user.userprincipalname|
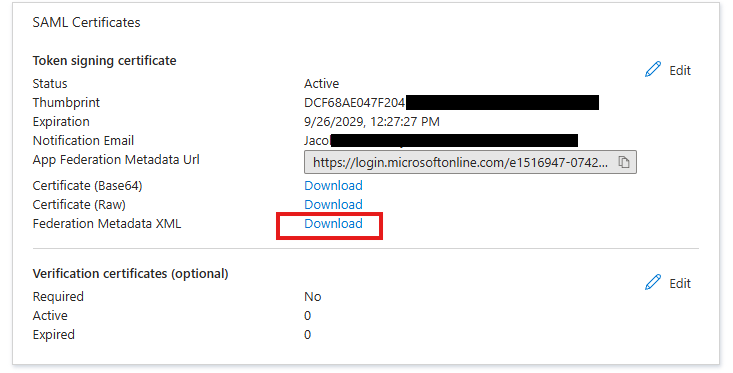
- The final step to complete the SAML configuration is to import the XML metadata to the DEX Agent Dashboard. Under SAML Certificates, click the Download link next to Federation Metadata XML.
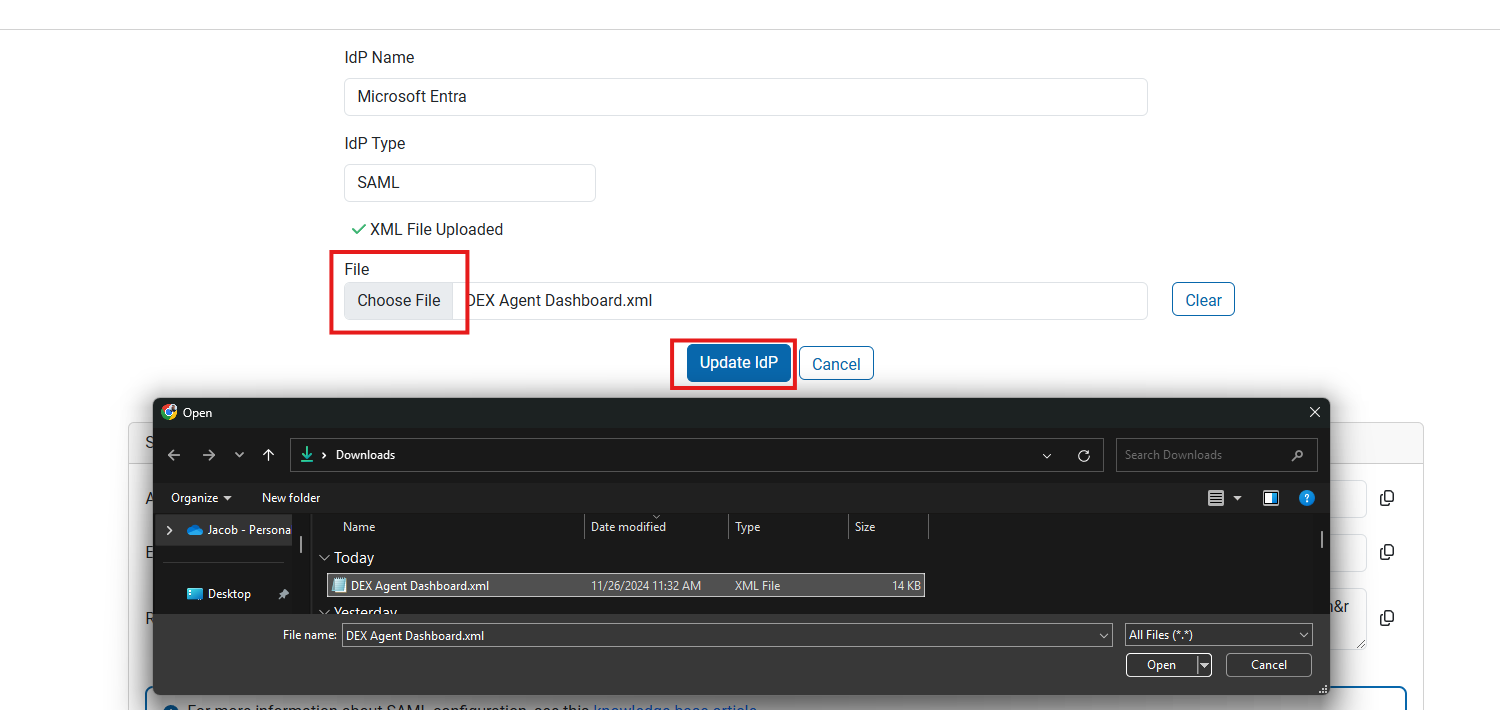
- Return to DEX Agent Dashboard browser tab. In your IdP configuration, click on Choose File and browse for the .xml file you downloaded. When the file is uploaded, click Update IdP.
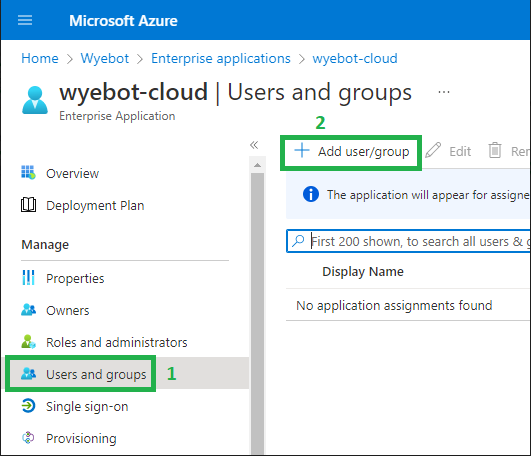
¶ Add Entra ID Users
Now that you have configured the Azure console and the Wyebot dashboard, you will need to grant user access to the application.
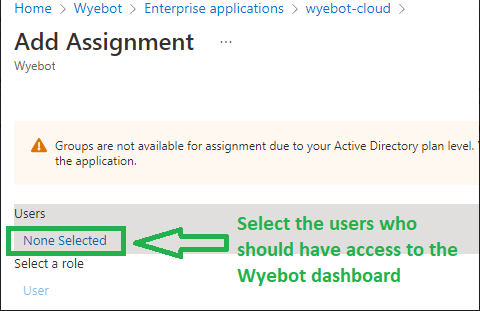
- Navigate to Users and groups, then Add user/group.
- Click on None Selected, then select whichever users you wish to give access to the Wyebot dashboard.
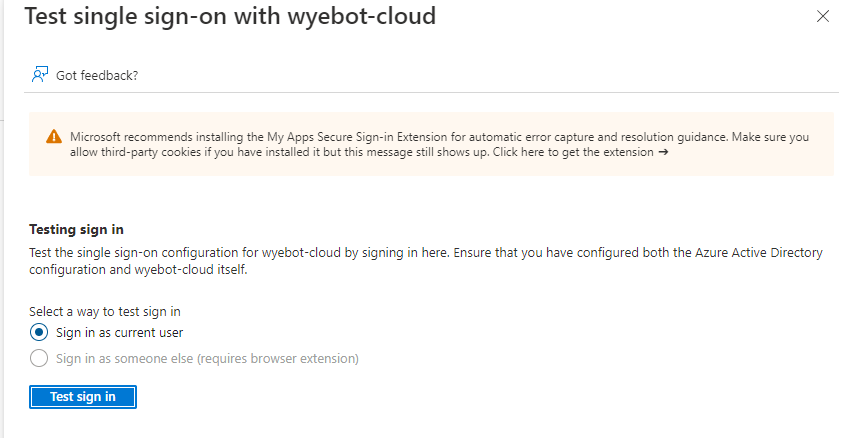
¶ Test Connection
Now that all steps are complete, you should now be able to login using SAML authentication. The Single Sign On page of the Azure Console has a Test option which you can use to validate the setup.