¶ Introduction
This document describes how to configure Microsoft AD FS to support SAML SSO with the Wyebot cloud dashboard. These instructions were written using Microsoft Server 2022 AD FS, but the steps should be similar with previous versions of Windows Server.
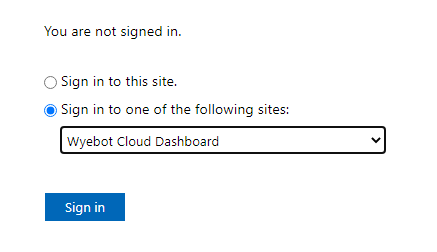
The Wyebot cloud dashboard supports IdP-initiated SAML SSO. This means the browser session starts at the IdP where the user logs in - not at the Wyebot cloud dashboard. After a successful authentication, the user’s browser session is redirected to the Wyebot dashboard where the session is validated and the user is granted access. The main benefit of SAML SSO is that user credentials are only stored locally in an organization’s infrastructure.
Limited users are currently not supported for SAML authentication.
On the Wyebot dashboard, user types of Admin, Read Only, and Limited are considered Local users. Password information for these users is stored locally in the Wyebot cloud database. SAML users are Non-Local users and no password information is stored locally for them.
You must always have at least one Local user configured on the dashboard. If your organization wishes to exclusively use SAML users, simply keep one Local user account configured on the dashboard. A Local user can have the same username as a SAML user.
¶ Terms Used in This Document
SAML - Security Assertion Markup Language is a standardized method of authenticating and redirecting browser sessions.
SSO - Single Sign-On allows a user to log into one site and reuse credentials across multiple other sites.
Identity Provider (IdP) - The device or provider that performs the authentication. In this example, the authentication is done by Active Directory.
Service Provider (SP) - The service that a user wishes to use. In this example, the SP is the Wyebot cloud dashboard.
SAML User - The user that is attempting to authenticate and access the SP. The user’s credentials are not stored on the SP, only on the IdP.
Consumer URL - The URL an IdP forwards a SAML request to following a successful authentication.
¶ Overview of Steps
The following steps must be completed to allow SAML SSO with the Wyebot dashboard:
- Enable SAML support on the Wyebot dashboard and configure IdP information.
- Add the Wyebot service as a Trusted Party on the AD FS server.
- Configure required attributes for the Wyebot service on the AD FS server.
¶ Configure SAML Support on the Wyebot Dashboard
All SAML configuration is done on the Management → Users tab of the Wyebot dashboard. Before enabling the feature, you must first get certificate information from your IdP. From the AD FS management console, select Certificates under the Service folder. This will show the certificates used by AD FS during authentication.
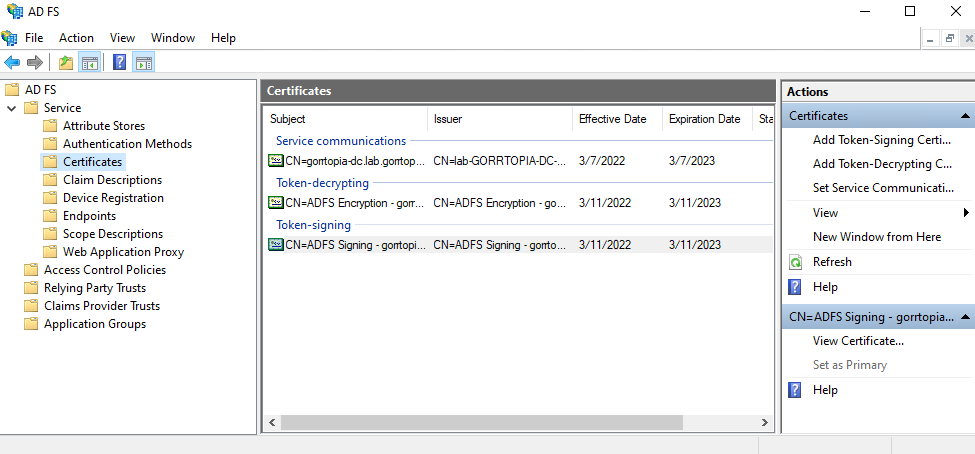
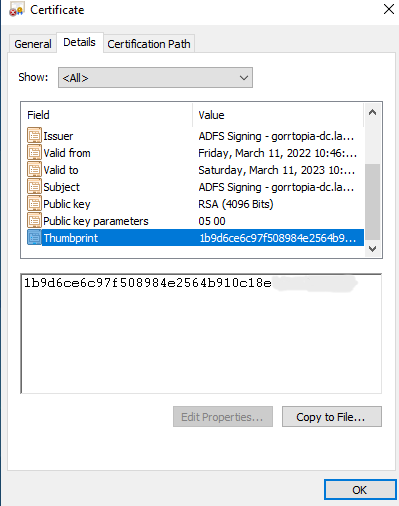
Double-click on the Token-Signing certificate and click on Details in the new window. At the bottom of the attributes list is the Thumbprint. This is a 20-byte hex string that identifies the certificate. Copy this string as it is shown (no spaces or colons).
Go to the Management → Users tab of the Wyebot dashboard. Click Enable next to SAML Authentication. Next click Add IdP. In the new window provide the following information:
IdP Name: a name to identify this IdP
X.509 Fingerprint: the fingerprint from the IdP certificate
Logout URL: this field is optional and can be used to redirect the user’s browser after logging out of the Wyebot dashboard
Consumer URL: dynamic URL that is generated after creating the IdP profile
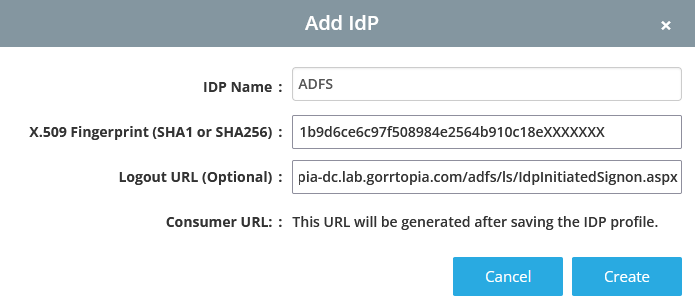
After creating the IdP profile, copy the Consumer URL that was generated. This will be configured on the ADFS server in the next step.
¶ Add Relying Party Trust
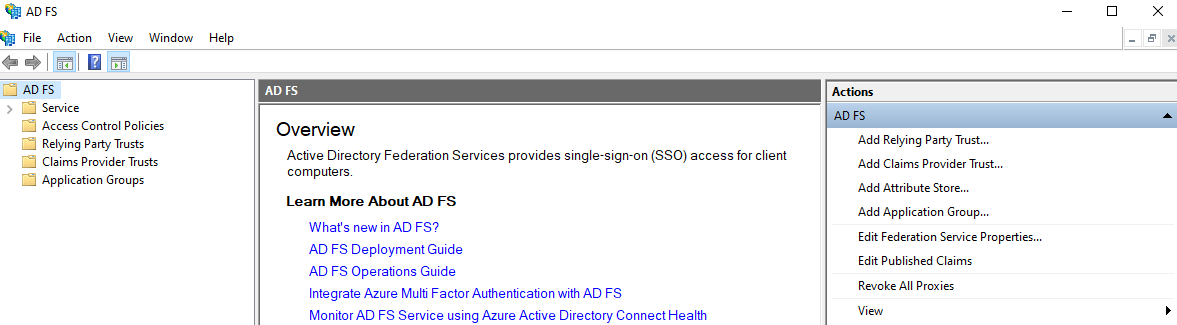
From the Windows Server Manager Dashboard, select AD FS Management from the Tools menu.
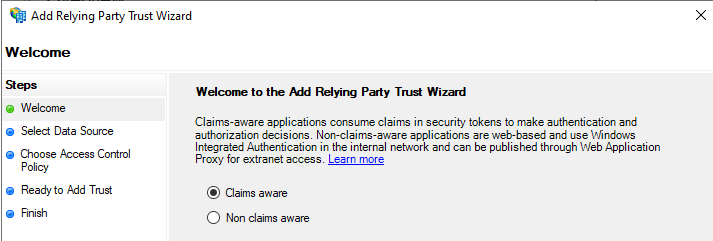
Select Add Relying Party Trust. In the wizard that opens, select Claims Aware and click Start.
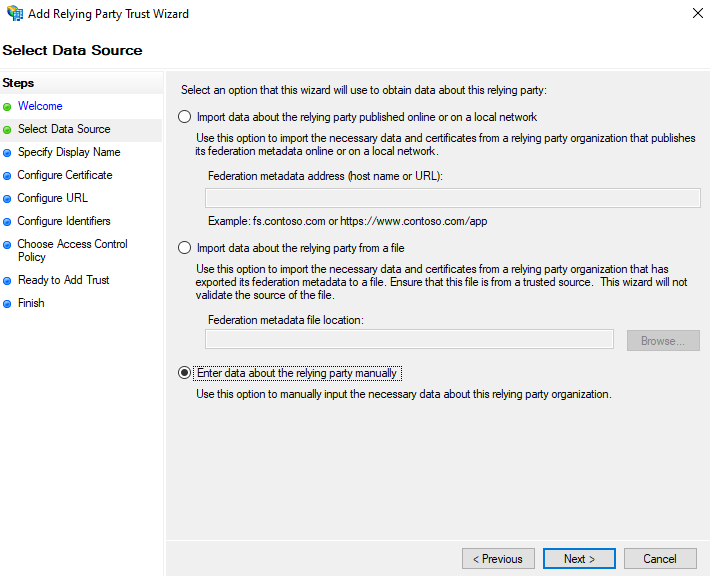
Select Enter data about the relying party manually and click Next.
Enter a display name that will identify this service on your IdP. We’ll use Wyebot Cloud Dashboard. Click Next.

The next screen allows you to specify a different certificate than the default ADFS certificate.
Certificate management is beyond the scope of this document. The fingerprint from whichever certificate you choose must match the one saved in the Wyebot dashboard.
Click Next to use the default certificate.
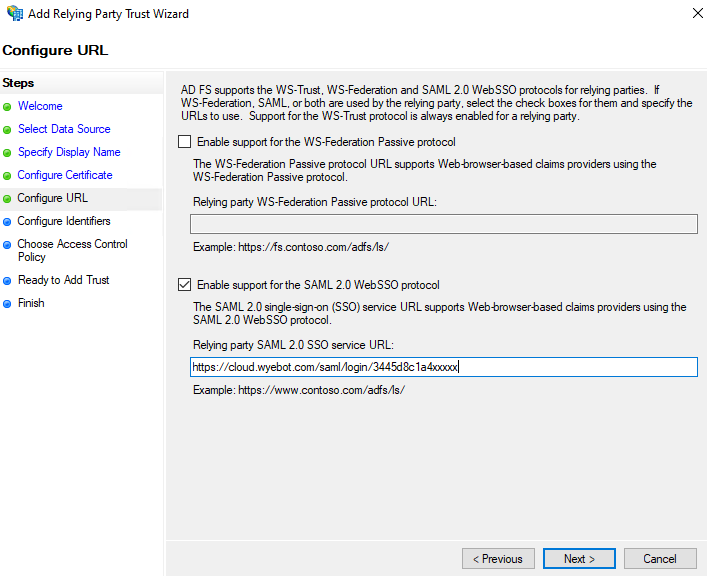
On the Configure URL screen, select Enable support for the SAML 2.0 WebSSO protocol. Enter the Consumer URL that is displayed in the Wyebot Dashboard on the Management-> Users page in the IdP section. This URL will have the form:
https://<cloud name>.wyebot.com/saml/login/<unique id>
Click Next. On the Configure Identifiers page, enter a URL in the following form and click Add:
https://cloud.wyebot.com
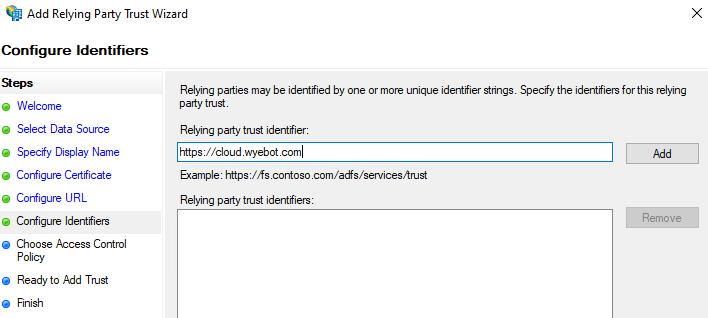
Click Next.
On the Choose Access Control Policy screen, set the permissions for your access policy. Policies are beyond the scope of this document. Leave at default and click Next to allow everyone to use this service.
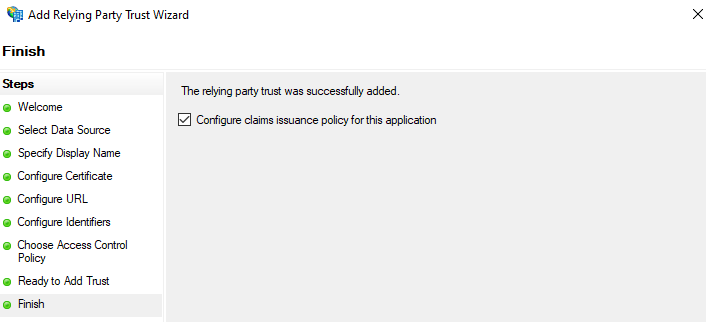
Click Next on the Ready to Add Trust screen.
Make sure there is a checkbox in the Configure claims issuance policy for this application. Click Close on the Finish screen.
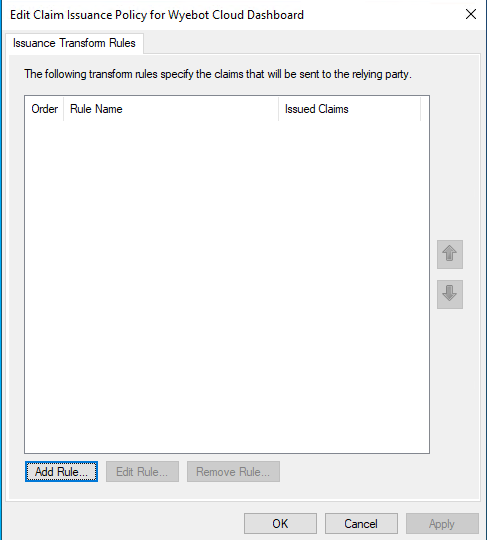
¶ Configure Attributes
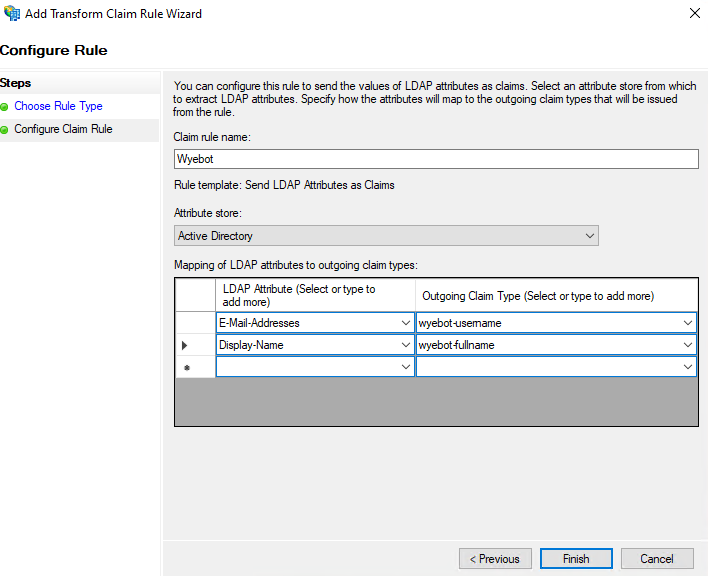
In the Edit Claim Issuance Policy window, click Add Rule.
In the Wizard, select Send LDAP Attributes as Claims and click Next.
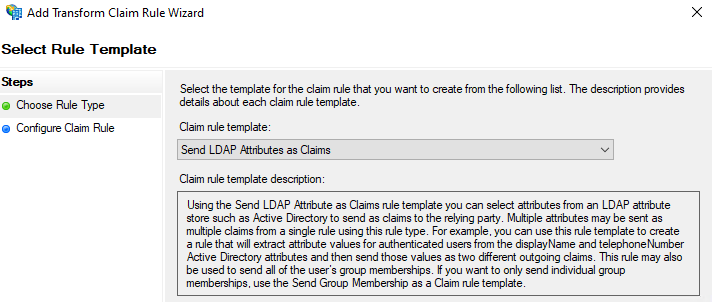
In the Configure Claim Rule window, give a name to the rule and select Active Directory as the Attribute Store. In the section below you will select a defined attribute from the left-hand dropdown and then manually type in a Wyebot-specified name in the right-hand dropdown. The attributes are:
| LDAP Attribute | Outgoing Claim Type |
|---|---|
| E-Mail-Addresses | wyebot-username |
| Display-Name | wyebot-fullname |
If these attributes are not entered exactly as shown, the user will not be allowed access to the Wyebot dashboard.
Click Finish and then OK. The Wyebot Cloud Dashboard should now be an available option for your IdP login screen.