¶ Introduction
Using Wyebot’s WiFi assurance dashboard, WiFi devices (client or AP) detected by Wyebot sensors will be represented by their wireless MAC address by default. This is not ideal as humans mostly prefer friendly names to identify devices within their network infrastructure.
Wyebot sensors attempt to automatically discover device names using a variety of techniques but some APs may continue to be displayed by their MAC address. There are two ways to ensure you will see friendly and informative names for your APs on the Wyebot dashboard: Manual and Automatic AP naming. You can manually name each discovered AP on the Wyebot dashboard. This can be error-prone and cumbersome depending on the number of APs in your network. The list must be manually maintained if new APs are added or names changed on the WLAN controller.
The better approach is to allow Wyebot sensors to discover AP names automatically. Aruba APs have the ability to broadcast the AP name within the 802.11 beacon frame. When this name is advertised, Wyebot sensors will learn it and use it in place of its MAC address everywhere on the dashboard. While some vendors broadcast the AP name by default, this feature must be explicitly enabled on Aruba APs.
Aruba refers to this feature as advertise-ap-name and enabling it varies based on the operational mode of the AP. This feature is not supported on the AP205.
Aruba APs can be managed in multiple ways. The methodology to enable the feature advertise-ap-name can vary slightly depending on the mode of operation. The sections below describe the instructions for each mode separately.
- Aruba Controller-based
- Aruba Instant AP: one of the APs acts as the controller
- Aruba Central: cloud-based solution
¶ Aruba Controller-based Solutions
Verified with AOS 8.6.0.5 and AOS 6.5.4.8
¶ GUI (Example shows AOS 8.x)
- Browse to Configuration > System > Profiles
- Choose "Wireless LAN" > SSID > [Your SSID Profile Name] > Advanced Options
- Check the box next to Advertise AP Name
¶ CLI (Applicable to both AOS 8.x and AOS 6.x)
As an example, follow these configuration steps to enable the feature on the SSID called my7005
(my7005) *[mynode] # configure terminal
(my7005) *[mynode] (config) # wlan ssid-profile my7005_ssid_prof
(my7005) *[mynode] (SSID Profile "my7005_ssid_prof") # advertise-ap-name
(my7005) ^*[mynode] (SSID Profile "my7005_ssid_prof") # write memory
Here is the resulting part of the configuration file:
wlan ssid-profile "my7005_ssid_prof"
        essid "my7005"
        opmode wpa2-aes
        a-basic-rates 24 36
        a-tx-rates 18 24 36 48 54
        g-basic-rates
        g-tx-rates 18 24 36 48 54
        g-beacon-rate 24
        a-beacon-rate 24
        advertise-ap-name
¶ Aruba Instant
Verified with Aruba software version 8.4.0.0. Not supported on the AP205.
The configuration change can only be applied using the CLI. The feature is enabled per SSID profile; it is not a global setting. Here are the exact steps to enable the feature on an SSID called “iap”
Aruba_Instant(config) # wlan ssid-profile iap
Aruba_Instant (SSID Profile "iap") # advertise-ap-name
Aruba_Instant (SSID Profile "iap") # exit
Aruba_Instant (config) # exit
Aruba_Instant # write memory
Aruba_Instant # commit apply
The resulting configuration section looks like:
wlan ssid-profile iap
 enable
 index 0
 type employee
 essid iap
 opmode enhanced-open
 advertise-ap-name
 max-authentication-failures 0
 rf-band all
 captive-portal disable
 dtim-period 1
 broadcast-filter arp
 dmo-channel-utilization-threshold 90
 local-probe-req-thresh 0
 max-clients-threshold 64
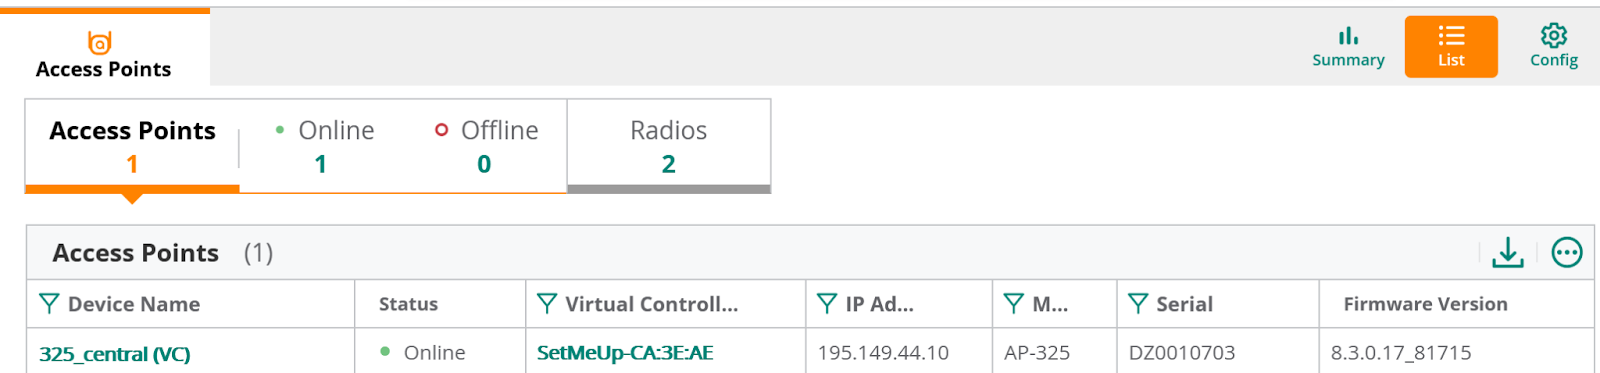
¶ Aruba Central
Verified with Aruba software version 8.3.0.17_81715
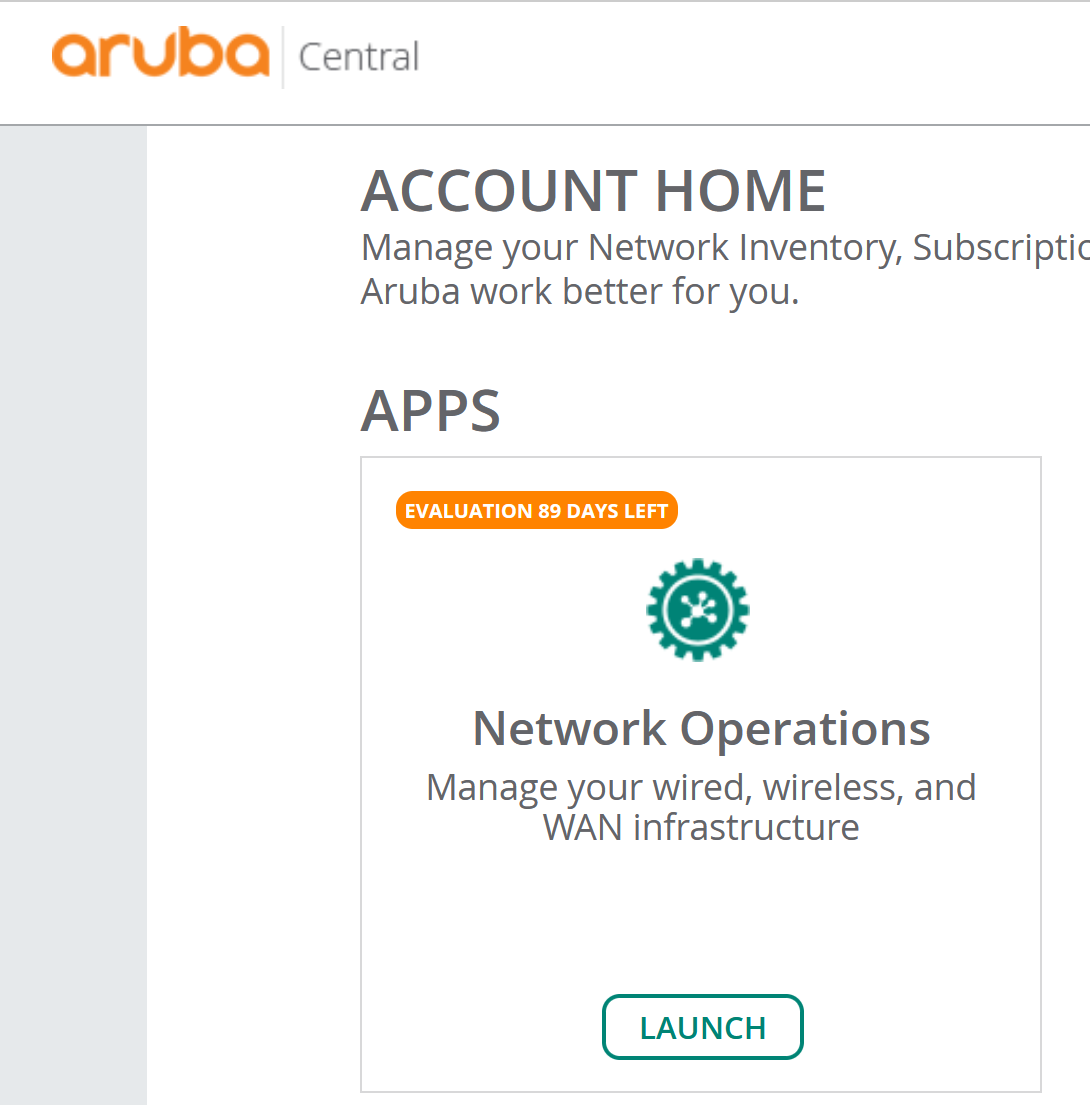
You will need to log into your Aruba Central account and follow this procedure:
- Launch Network Operations
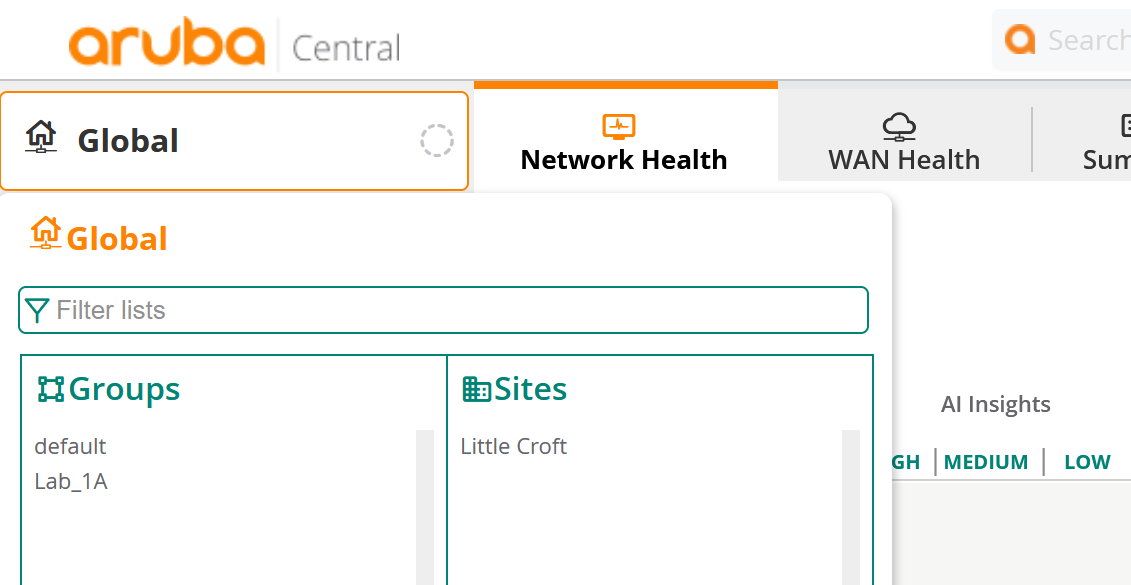
- Using the navigate sidebar, click on “Global” and choose your target device group
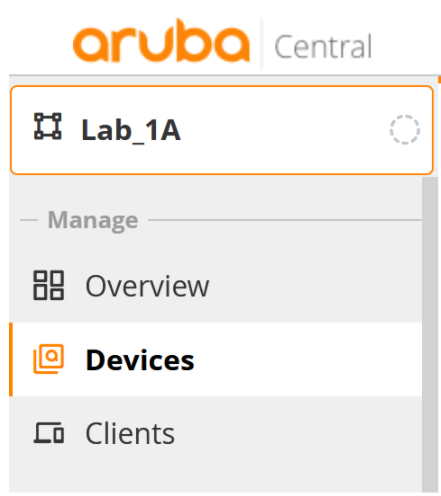
- Now you have the correct group, select “Devices” using the navigate sidebar
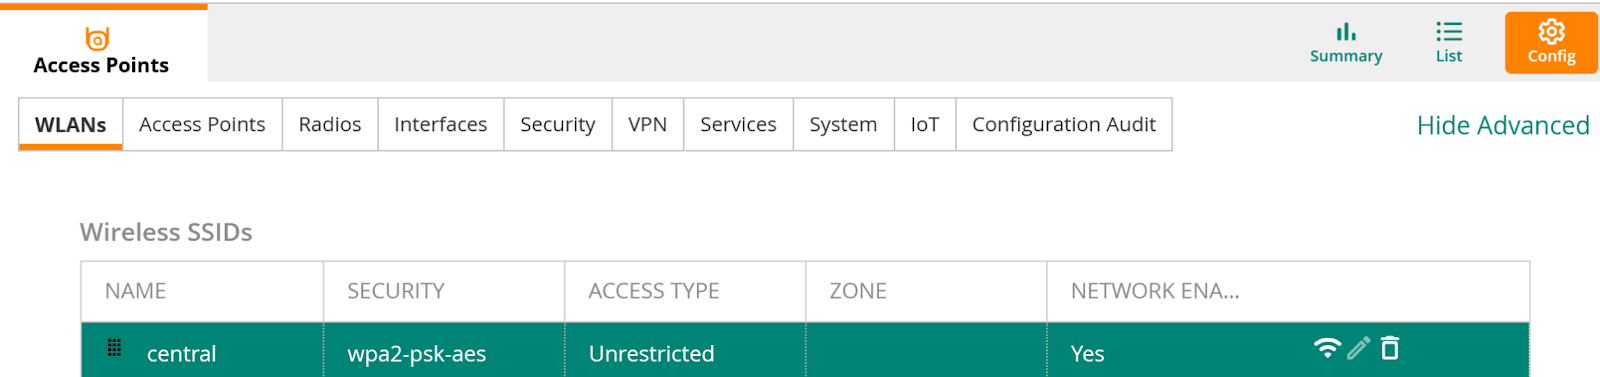
- Ensure the “Access Points” tab is selected. Click the config icon (the cog) at the upper right. This will expose the feature tabs (seen in the second screenshot)
- Select the target SSID to highlight the entry. Now click the edit (pencil) icon at the far right
- Click “Advanced settings” to expose more configuration options
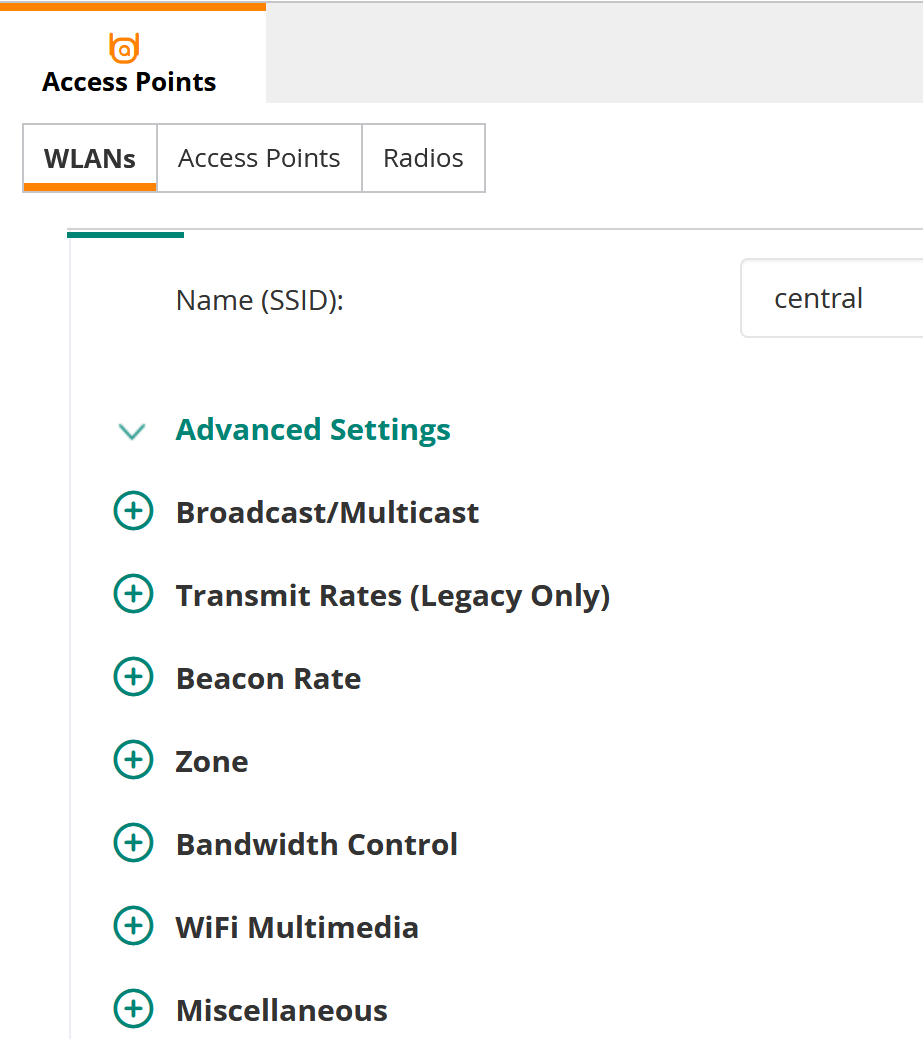
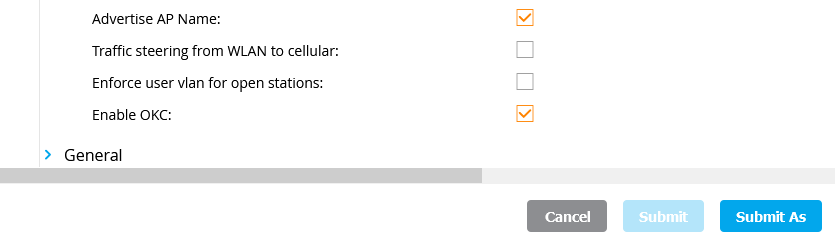
- Open Miscellaneous and scroll to the bottom. Here you will find the option “Advertise AP Name”. Enable it by moving the radio button to the right (turns for grey to green)
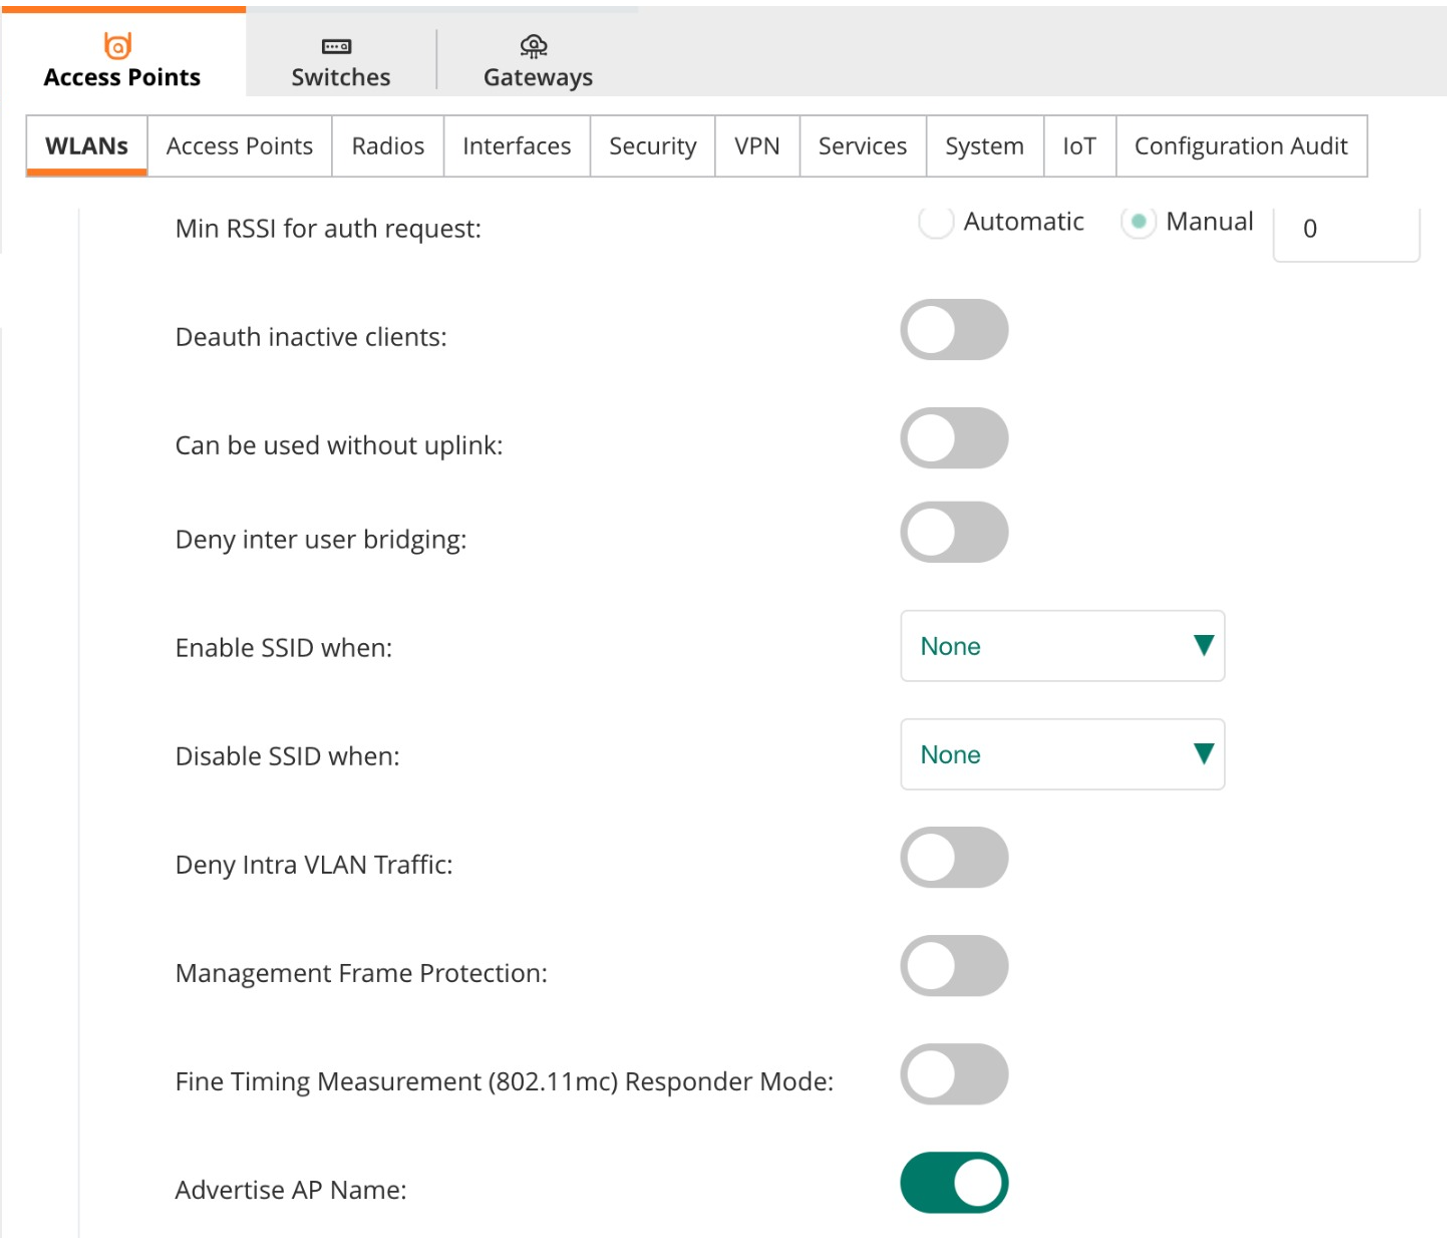
- Remember to save your changes with the button click

- This procedure will need following for each SSID in each Group.