¶ Introduction
Radio settings are one of the most important parameters to adjust to optimize your wireless network. Oftentimes the “out of the box” settings from a given WLAN controller stray outside of industry best practices. You may also want to customize your radio settings to suit your unique wireless environment. This guide will explain how to adjust the radio settings on your Meraki dashboard.
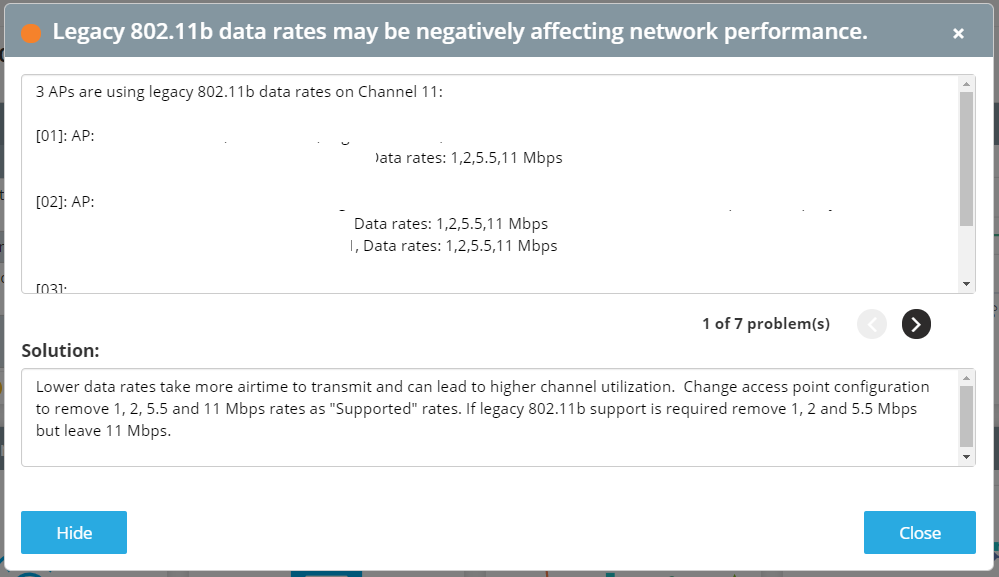
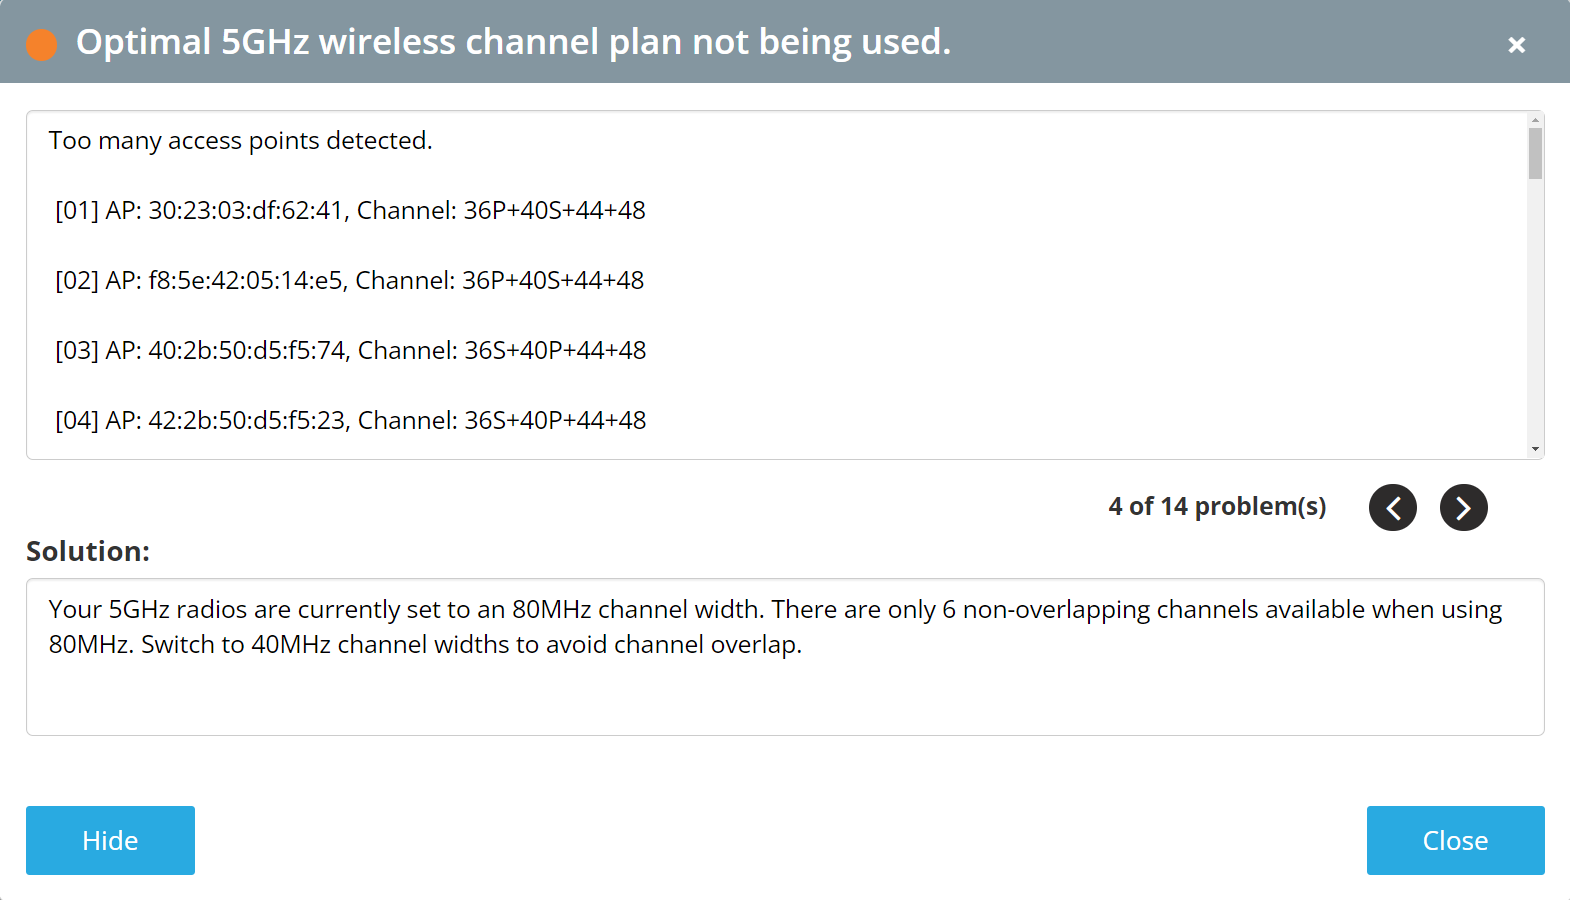
¶ Related Wyebot Signatures
Below are screenshots of some signatures that trigger on the Wyebot dashboard related to the radio settings on the Meraki dashboard.
¶ Instructions
The guide was written based on a Meraki dashboard with APs on firmware version 30.5.
- Navigate to Wireless > Radio Settings
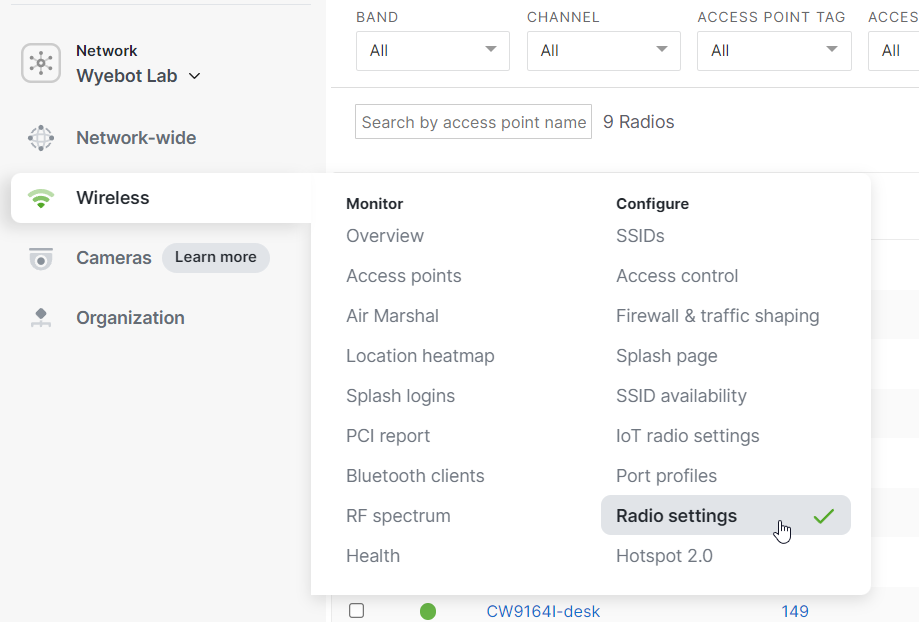
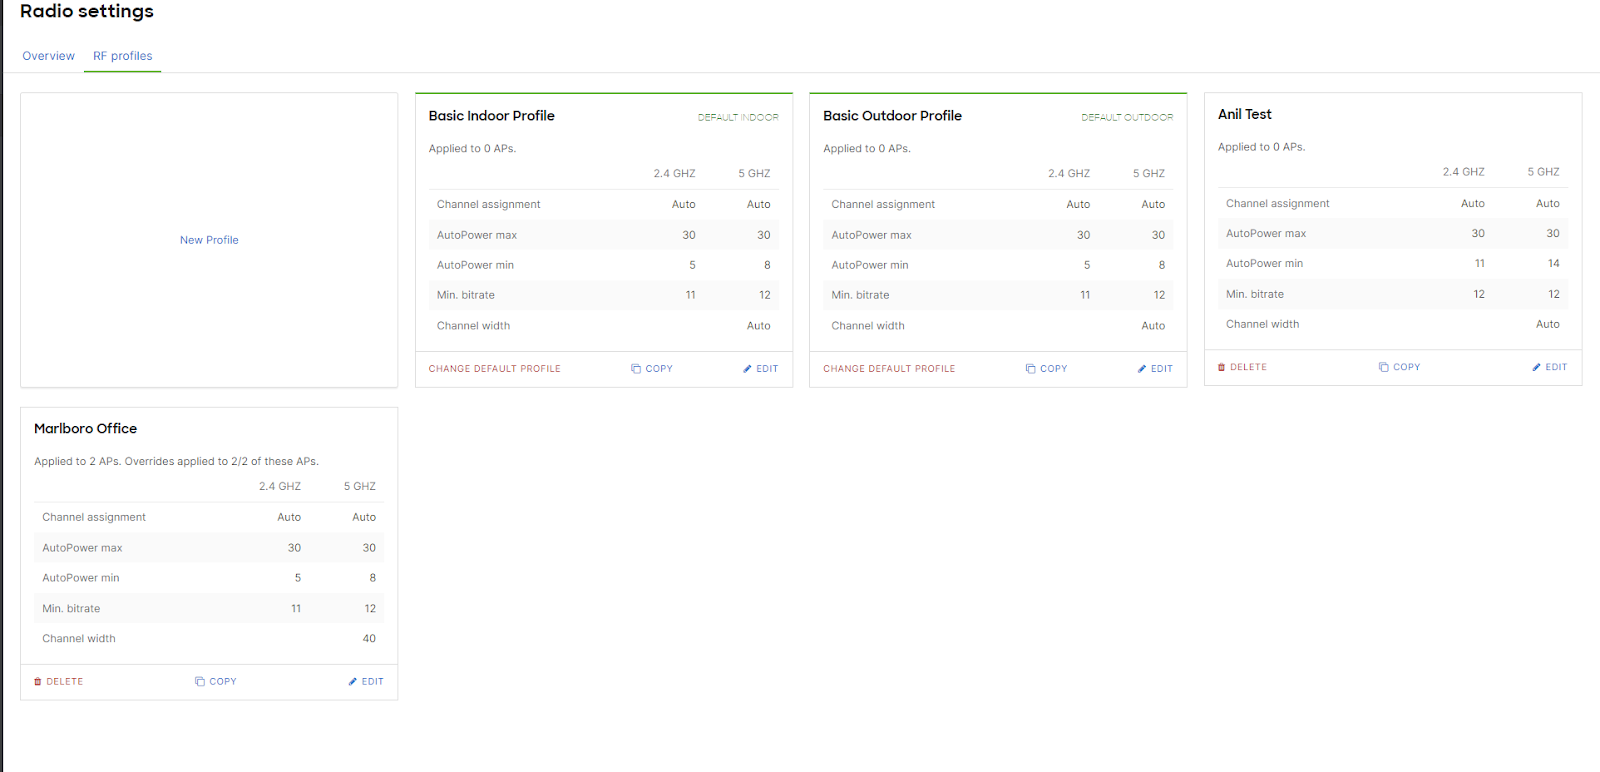
- Click on RF Profiles

- Select the profile you wish to edit, or create a new one. You can have multiple profiles assigned to different APs depending on your requirements.
¶ RF Profile Setup
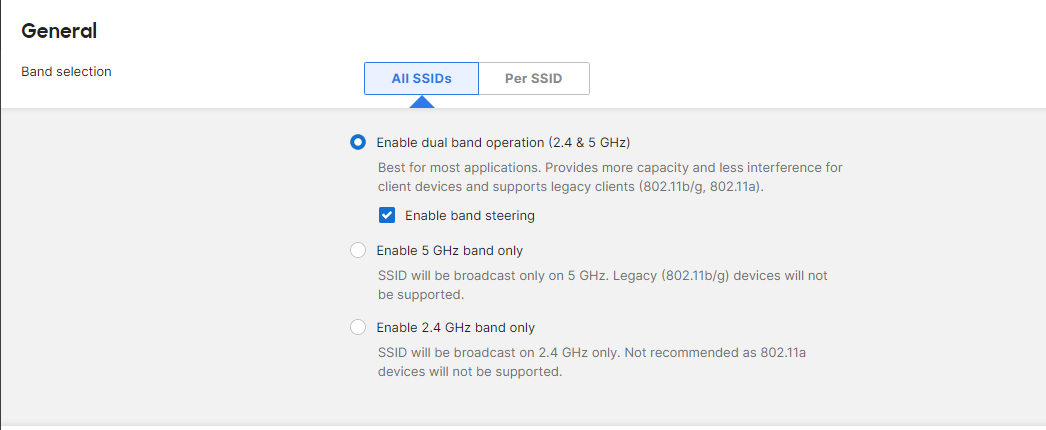
- Band selection/band steering can be enabled by clicking the radio buttons under “General”. These configuration changes can also be made per SSID by selecting the “Per SSID” tab.
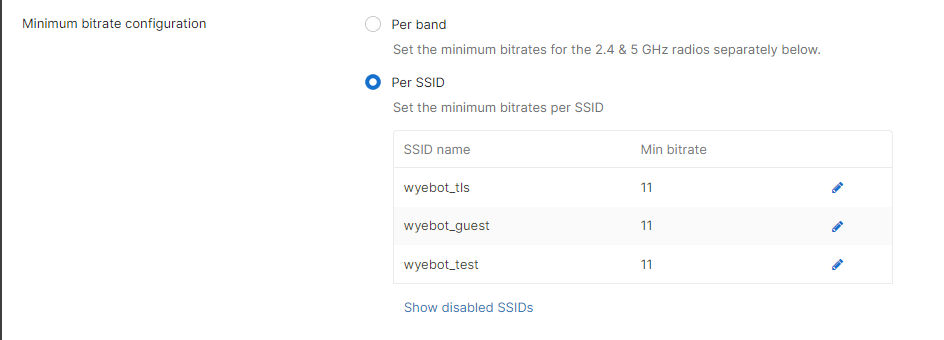
- Minimum bitrate can be configured per SSID or per Wi-Fi band (2.4GHz/5GHz).
a. Per SSID allows you to have a different minimum rate for each WLAN. Can be useful if you have an SSID to support legacy 802.11b clients.
b. We suggest a minimum bitrate of 12 mbps, or 11 mbps if you have legacy clients. Setting the minimum rate above 24 mbps is not recommended.
- Client balancing is Meraki’s method to load balance clients between APs. Consider turning this on if the profile is applied to an area with multiple APs servicing the same coverage zone.

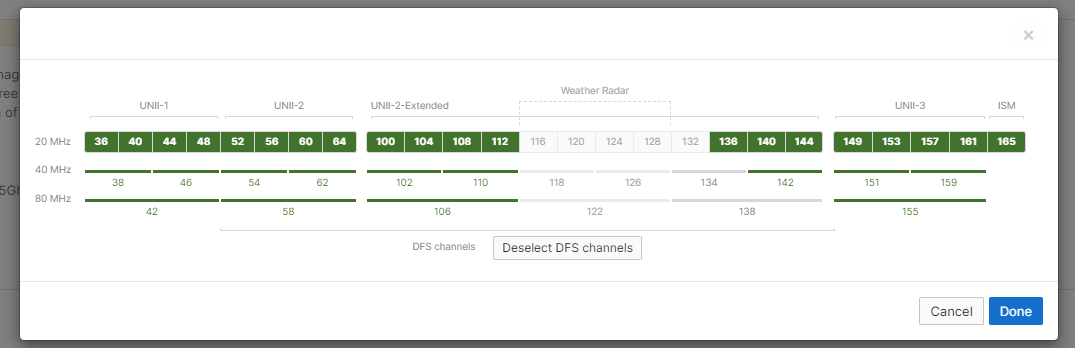
- 2.4GHz/5GHz settings can be configured by scrolling down further. To change allowed channels for the APs to auto select, click the green text next to “Channel Assignment Method”
- Transmit power can be set per band. It may be a good idea to set the 2.4GHz range to a lower value, like 5 to 11 dbm.

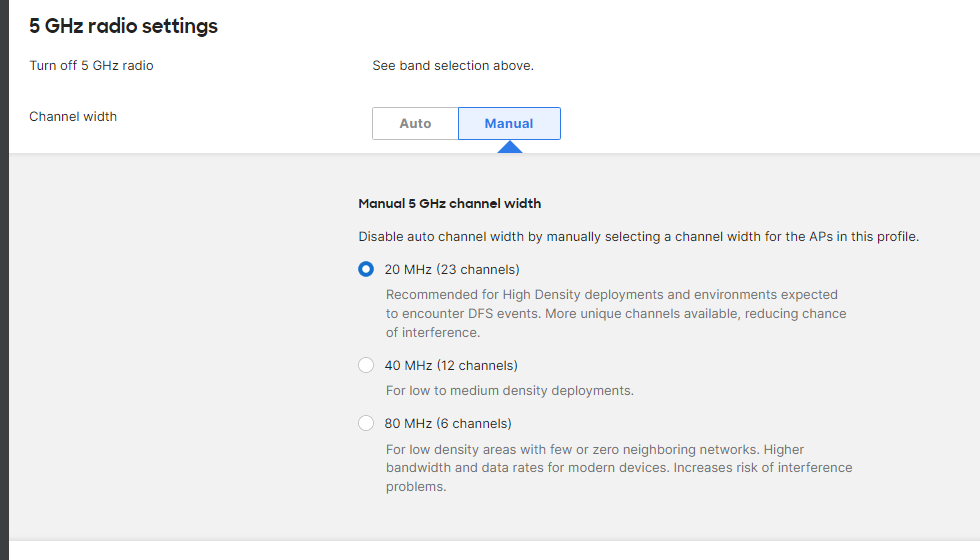
- Channel width can only be set for the 5GHz band. In general we suggest a width of 20MHz or 40MHz depending on AP/Client density. 80MHz is not recommended in Enterprise Wi-Fi.