¶ Introduction
Radio settings are one of the most important parameters to adjust to optimize your wireless network. Oftentimes the “out of the box” settings from a given WLAN controller stray outside of industry best practices. You may also want to customize your radio settings to suit your unique wireless environment. This guide will explain how to adjust the radio settings on Ruckus WLAN controllers. It also includes best practice guidelines for the 2.4GHz and 5GHz band.
¶ Related Wyebot Signatures
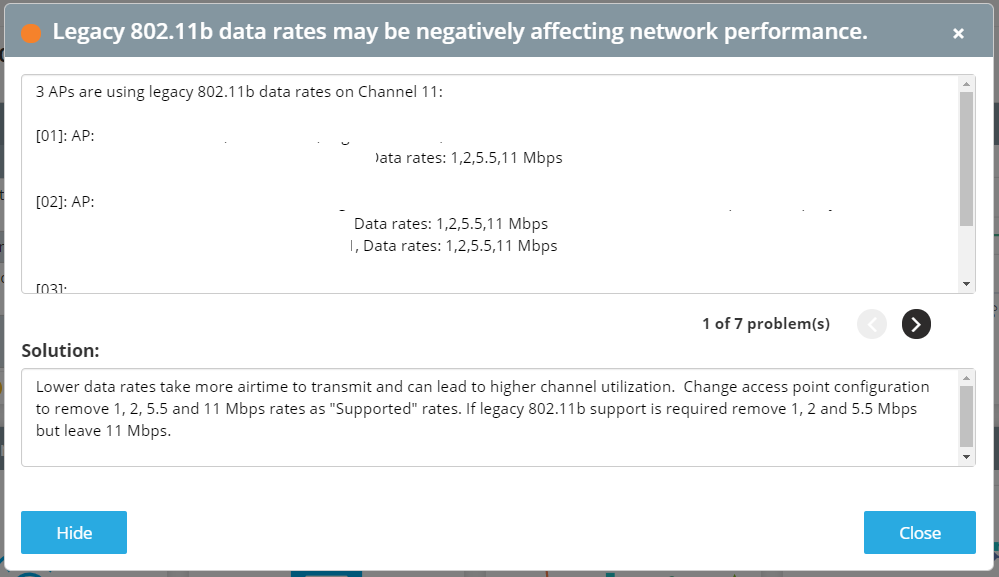
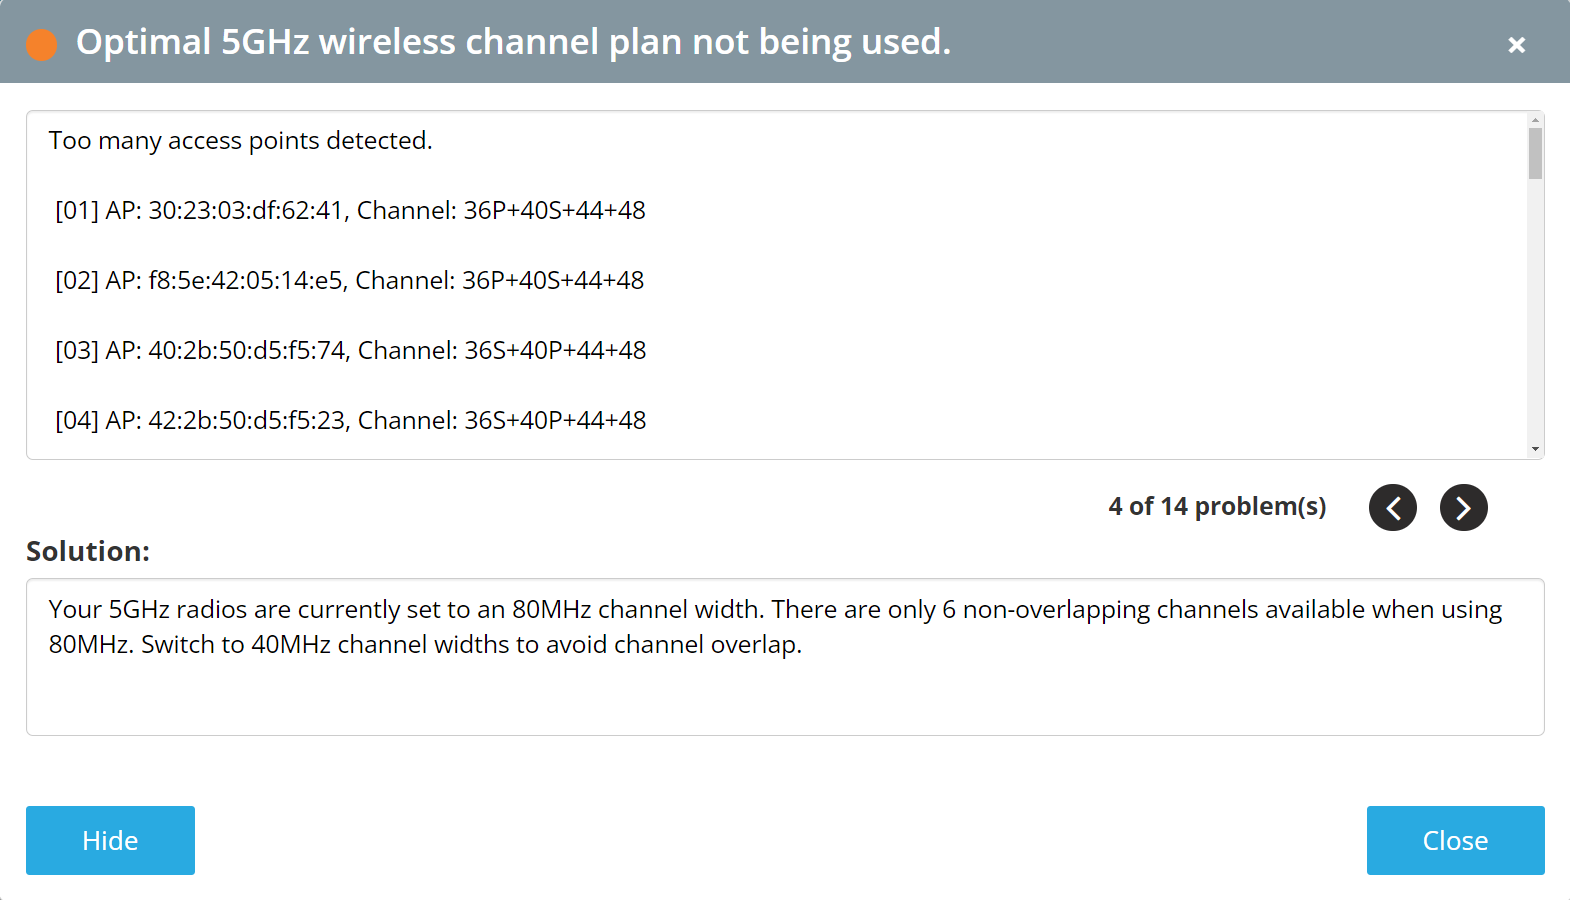
Below are screenshots of some signatures that trigger on the Wyebot dashboard related to the radio settings on the Ruckus WLAN controller.
¶ Instructions
The guide was written based on a SmartZone 100 running firmware version 5.1.2.0.302. Your Ruckus GUI may differ slightly.
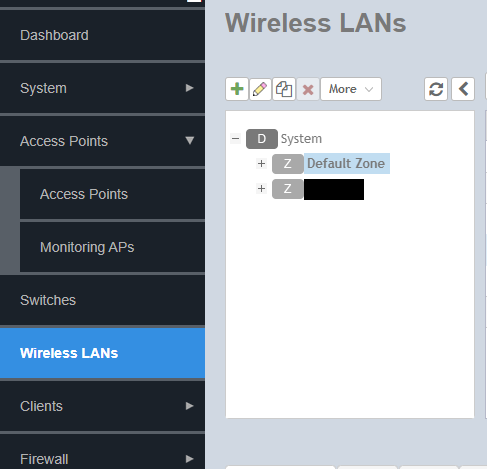
- Navigate to Wireless LANs and click on the group you wish to edit
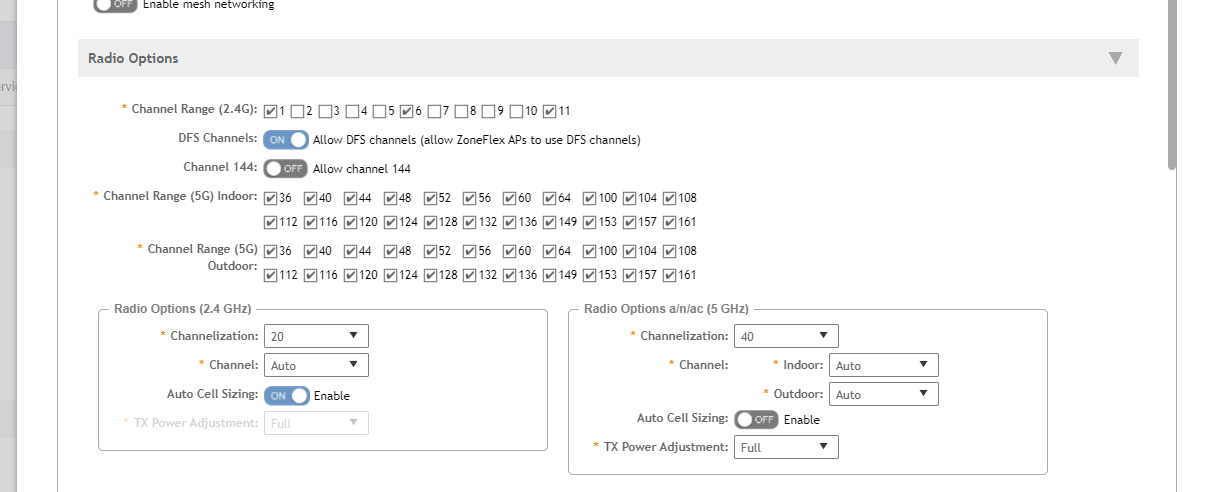
- Under the Radio Options header you will find settings pertaining to Channel selection, channel width, etc.
¶ Terminology
- Channel Range - Channels selected will be available for use on APs within this group
- DFS Channels - Enabling this will allow usage of additional 5GHz channels in the Radar band. This will greatly increase the number of available channels, but they are not supported by all AP models.
- Channelization - Channel Width (20MHz, 40MHz, 80MHz)
- Auto Cell Sizing - Automatic transmit power adjustment
On older firmware Auto Cell Sizing may not be available, instead the TX Power Adjustment drop-down will have an “Auto” option
¶ Best Practice Guidelines
¶ 2.4GHz
-
Make sure only channels 1, 6, and 11 are selected in Channel Range
- Adjacent 2.4GHz channels (e.g. 1 and 2) overlap - 1, 6, and 11 are the only three that do not overlap with each other.
-
Set channelization to 20, do not use 40
-
Leave Channel on Auto to let APs pick channels automatically, or select individual APs from the Access Points table to manually set channel assignment.
-
Generally it is better to have 2.4GHz at a lower power, so manually turning the power down or enabling auto transmit power can be a good idea.
- You may also consider disabling 2.4 strategically on certain APs.
¶ 5GHz
-
We recommend enabling DFS channels
- DFS will increase available number of channels from 8 to 22
-
All channels should be selected in channel range
- 5GHz adjacent channels do not overlap, unlike 2.4GHz
-
Set channelization (channel width) to 20 for high density, 40 for lower density. 80 is not recommended.
- If using 40MHz or greater ensure DFS Channels are enabled
-
Leave Channel on Auto to let APs pick channels automatically, or select individual APs from the Access Points table to manually set channel assignment.